You can do the initial workflow setup on Jobvite portal by the following steps:
1. Go to the Jobvite portal
2. Click the Profile icon and then click Admin.
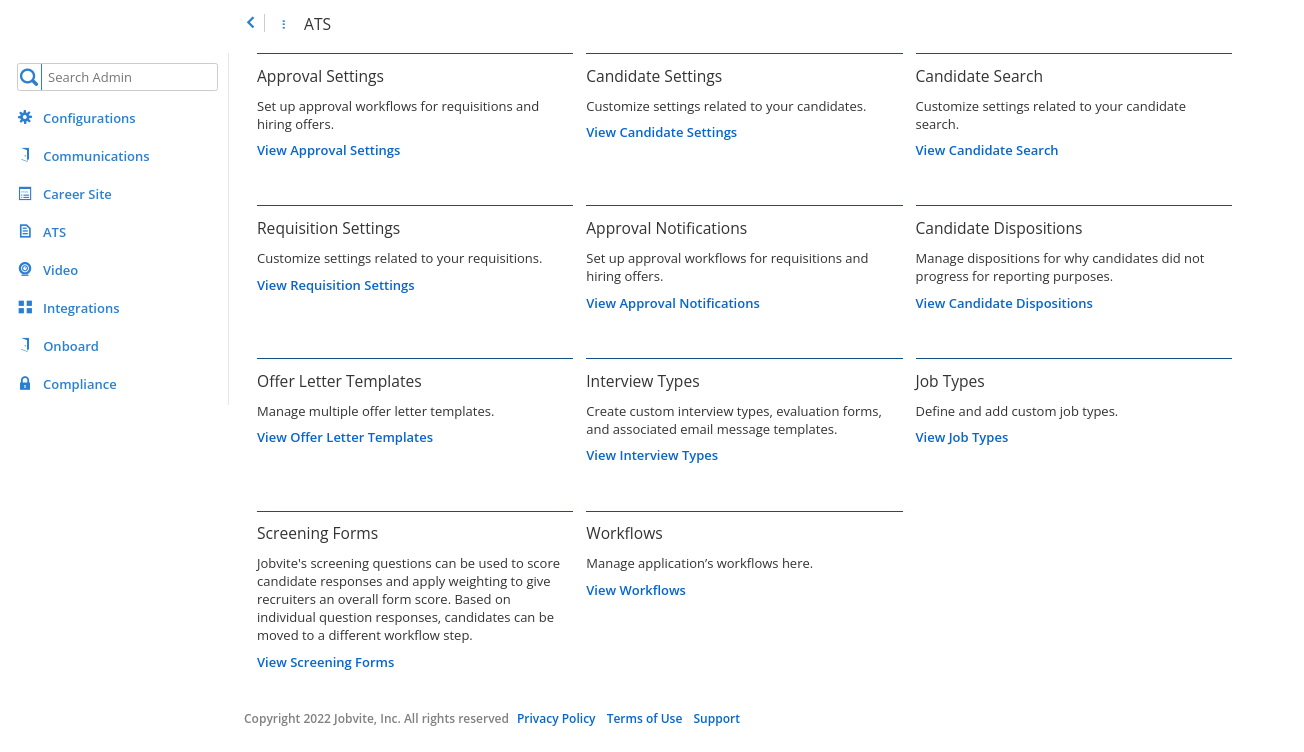
3. Click on ATS -> View Workflows and edit General workflow.
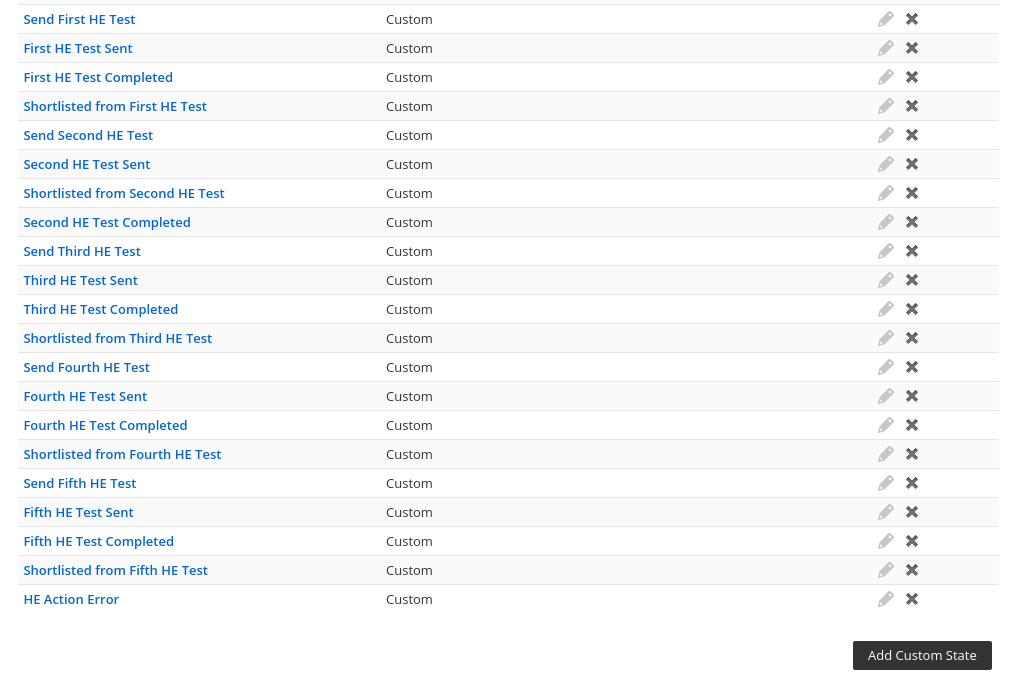
4. Now add the following custom stages:
-
-
-
Send First HE Test
-
First HE Test Sent
-
First HE Test Completed
-
Shortlisted from First HE Test
-
Send Second HE Test
-
Second HE Test Sent
-
Second HE Test Completed
-
Shortlisted from Second HE Test
-
Send Third HE Test
-
Third HE Test Sent
-
Third HE Test Completed
-
Shortlisted from Third HE Test
-
Send Fourth HE Test
-
Fourth HE Test Sent
-
Fourth HE Test Completed
-
Shortlisted from Fourth HE Test
-
Send Fifth HE Test
-
Fifth HE Test Sent
-
Fifth HE Test Completed
-
Shortlisted from Fifth HE Test
-
HE Action Error
-
-
5. If the user wants to Integrate Facecode too, then they will have to add a few more custom stages:
-
Send First HE Interview
-
First HE Interview Sent
-
First HE Interview Completed
-
Send Second HE Interview
-
Second HE Interview Sent
-
Second HE Interview Completed
-
Send Third HE Interview
-
Third HE Interview Sent
-
Third HE Interview Completed
-
Send Fourth HE Interview
-
Fourth HE Interview Sent
-
Fourth HE Interview Completed
-
Send Fifth HE Interview
-
Fifth HE Interview Sent
-
Fifth HE Interview Completed
6. Now click on Configurations -> View Custom Fields.
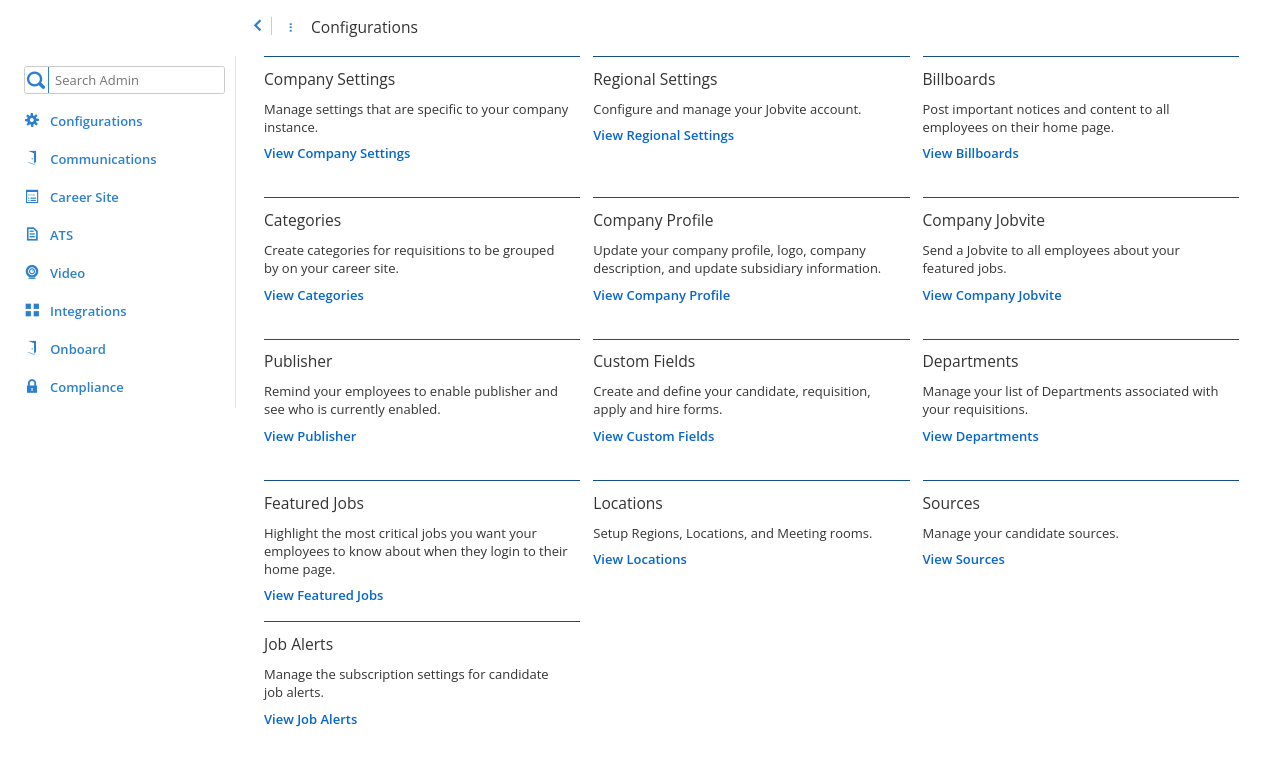
7. Under Requisition add these 5 custom fields:
-
-
-
First HE Test ID
-
Second HE Test ID
-
Third HE Test ID
-
Fourth HE Test ID
-
Fifth HE Test ID
-
-
Note: While creating these fields, select Type as Text

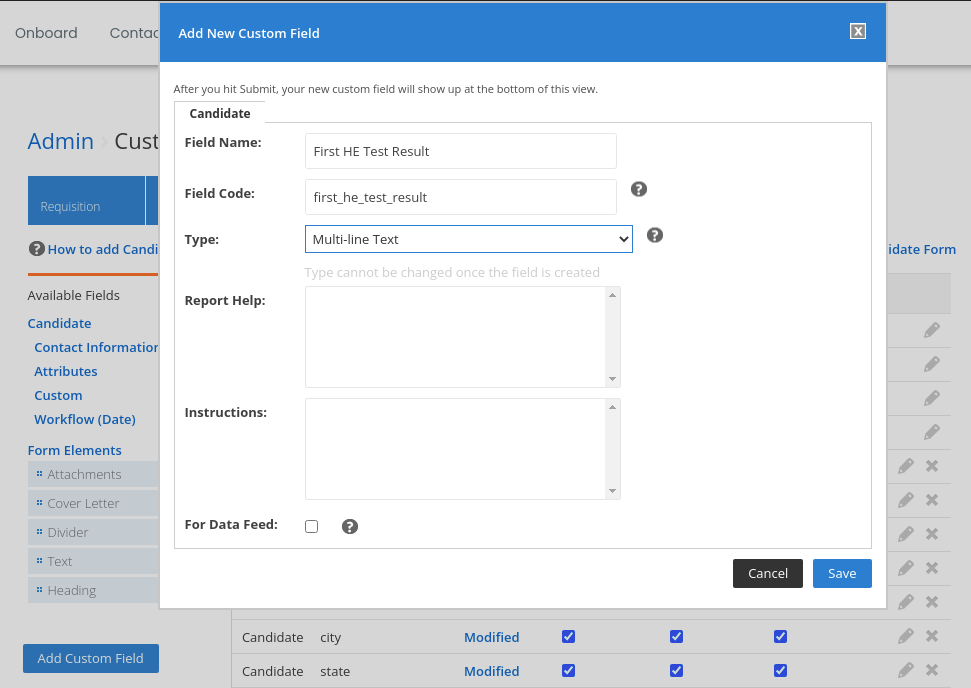
8. Now under Candidates add these 5 custom fields:
-
-
-
First HE Test Result
-
Second HE Test Result
-
Third HE Test Result
-
Fourth HE Test Result
-
Fifth HE Test Result
-
-
Note: While creating these fields, select Type as Multi-line Text.
9. If the user wants to Integrate Facecode too, then they will have to add a few more custom fields:
-
-
-
First HE Interview Link
-
First HE Interview Result
-
Second HE Interview Link
-
Second HE Interview Result
-
Third HE Interview Link
-
Third HE Interview Result
-
Fourth HE Interview Link
-
Fourth HE Interview Result
-
Fifth HE Interview Link
-
Fifth HE Interview Result
-
-
Note: While creating these fields, select Type as Multi-line Text.