![HE logo.png]](https://help.hackerearth.com/hs-fs/hubfs/HE%20logo.png?height=40&name=HE%20logo.png)
In this article, you will learn how to:
To invite candidates, follow these steps:
1. Log in to your HackerEarth Recruit account using your admin credentials.
2. Click Assessments.
3. Navigate to the assessment for which you want to invite candidates. Click Invite candidates.

Important: You must publish the assessment to invite candidates.
4. You can also select the assessment and then click Invite candidates.

5. You can invite the candidates by either of the two methods:
Inviting candidates by entering their information
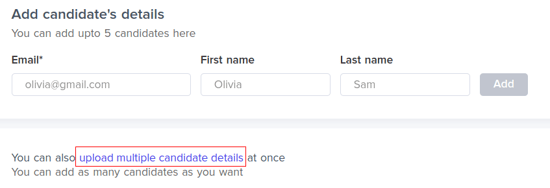
You can only invite up to 5 candidates using this method. You need to enter the following information:
-
-
- Email (mandatory)
- First name
- Last name
Click Add to add the candidate to the invite list.
-
Inviting the candidates through bulk upload
1. Click upload multiple candidate detail.
2. To download the sample file, click Download sample template.
3. Fill out the sheet with your candidates' details, then upload it by clicking Upload file.
- Only the first sheet of the Excel file is considered.
- Email ID is mandatory for each candidate.
- You can add a maximum of 5 tags per candidate.
4. Once your file is uploaded successfully, choose a Delivery schedule:
- Send immediately — invites go out as soon as you click Invite candidates.
- Schedule for later — pick a date and time (in your profile's timezone) for the invites to be sent.
.png?width=670&height=838&name=image%20(15).png)
5. If you choose to schedule for later, enter the date and time. This must be:
-
-
At least 1 hour from the current time, and
-
No more than 60 days from now, or the test's end date — whichever comes first.
-
6. Optionally, set an Invite expiration date. Enter the date on which the test invite expires, in DD/MM/YY format. The invite expires at 11:59:59 PM IST on the date that you select, and candidates cannot start the test after that time.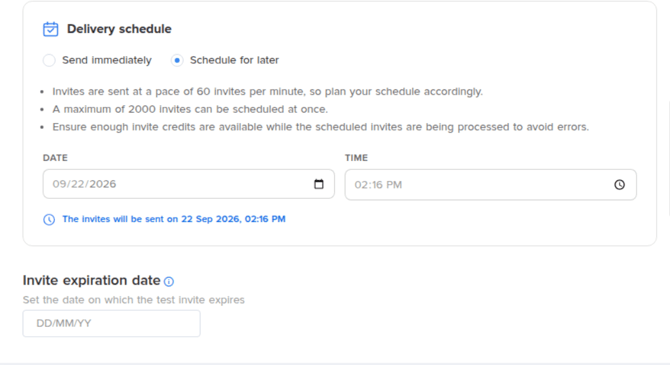
7. Click Invite candidates to confirm.
A notification will appear at the top of your screen once you have successfully invited candidates to take the test.

A few things to keep in mind while scheduling:
- Invites are sent at a pace of about 60 per minute, so plan accordingly if you're working close to a deadline.
- Up to 2,000 rows can be scheduled in a single batch.
- Make sure you have enough invite credits available for when the scheduled job runs — the invites will fail to send if you run out.
Managing an active schedule
Only one bulk invite schedule can be active per test at a time. Once a schedule is created, you'll see a banner confirming the scheduled date and time, along with a Cancel schedule button.
If you need to change the candidate file or the scheduled time, you'll need to cancel the existing schedule first, then upload a new file and set up a new schedule.
What happens when the scheduled invites go out
Once the scheduled job runs, the admin who set up the schedule receives an email with the outcome:
- Success — all invites were dispatched. The email includes the test name, dispatch time (with timezone), total candidates uploaded, invites sent, and a link to view the invited candidates on your dashboard.
- Partial success — invites were dispatched, but some rows in the uploaded file couldn't be processed (for example, due to invalid email addresses). The email includes the same summary, plus a note that rows were skipped. A detailed error report is attached when available.
- Failed — none of the invites could be sent. The email includes the reason for the failure (when known), a link to your dashboard, and any relevant attachments.
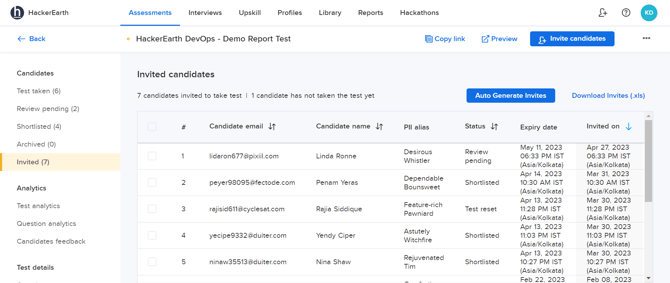
You can see all the invited candidates for the assessment under the Candidates section. Select Invited, and a list of invited candidates will be displayed.