For more information about the various components of a programming problem, see Parts of a programming problem.
DescriptionAdding the problem statement and description
- In the Test Details section, click Questions.
- Click Create a new question.
- In the Select question type pane, click Programming in the Coding section.

- In the Create Programming question window, perform the following tasks:
- Enter the name of the problem in the Problem name field.
- Enter a descriptive problem statement describing the problem, input and output format, and constraints.
- Click Next.
Your problem has been created with a problem name and description.
The next step is to add the solution and test cases.
Adding the sample input and output
Sample input
Sample input is used to drive the candidate in the right direction with respect to the logic. This is one of the input cases that is exposed to the candidate. It is used to run their code when they click Compile and Test.
Prerequisites
- Format: .txt only
- Naming convention: in00.txt, in01.txt, in03.txt, etc.
- Size: Up to 5 MB
Steps
To upload the sample input file, follow these steps:
- Hover over You have not added the Sample input file.
- Click Upload file.
- Navigate to the location where the .txt file is stored in the system.
- Double-click the file.
Input file guidelines
The input file must not contain the following:- Empty lines anywhere in the file, even intermediate ones. This means that in a file, you cannot have lines that are completely blank.
- Leading white spaces in the first non-empty line (a line containing any character other than white space). When you have a line that contains text (letters, numbers, symbols, etc.), this line must not start with any spaces, tabs, or other types of whitespace characters.
- Trailing white spaces in all the non-empty lines.
A sample output file comprises the output conditions that a solution must meet to be compiled successfully. After a candidate writes the solution to a problem, the solution must be compiled, tested, and then submitted.
Prerequisites
- Format: .txt only
- Naming convention: out00.txt, out01.txt, out02.txt, etc.
- Size: Up to 5 MB
Steps
To upload the sample output file, follow these steps:
- Click You have not added the Sample output file.
- Click Upload file.
- Navigate to the location where the .txt file is stored.
- Double-click the file.
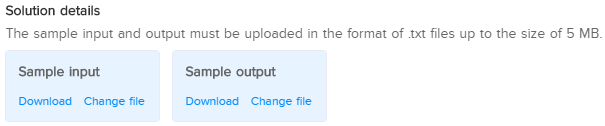
Downloading or changing the input or output files
You can also download the uploaded file or change the file that you have uploaded by hovering over Sample input. Click Download to download the file and click Change file to change the file that you have uploaded.
Adding the ideal solution and sample explanation
Ideal solution
This is the correct logic that is used to solve the question. It is used to generate an expected output based on the custom input that a candidate provides. Please take a look at the image below to see a sample ideal solution.

Ideal solution in C++
Prerequisites
- Format: Must have the same file extension as the programming language in which the solution is written.
- CPP: The extension should be .cpp.
- CPP14: The extension should be .cpp14.
- Java 7: The extension should be .java.
- Java8: The extension should be .java8.
- Java 14: The extension should be .java14.
- Python 3: The extension should be .py3.
- Size: Maximum size of the file must be 1 MB
Steps
To upload the ideal solution, follow these steps:
- Click You have not added the ideal solution.
- Click Upload file.
- Navigate to the location where the relevant file is stored.
- Double-click the file.
Sample explanation
This is a logical explanation of how the sample output is derived from the sample input. This explanation is visible to the candidate.
Steps
To add a sample explanation, follow these steps:
- In the Sample field, enter the logical explanation of how the sample output of the problem is derived from the sample input.
- Format as required
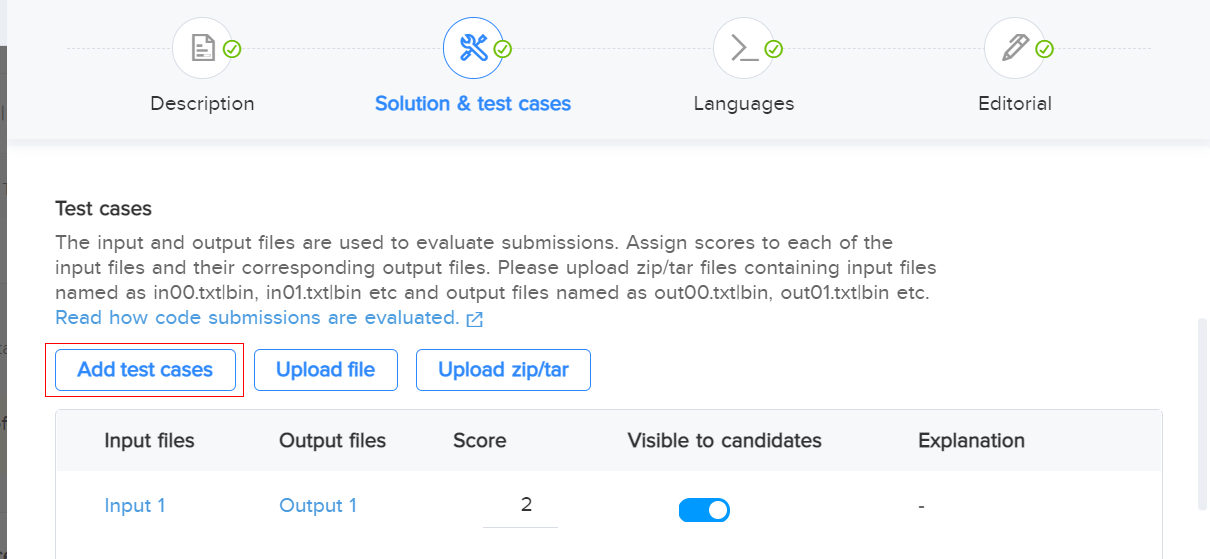
Adding test cases
Test cases, also known as input and output files or tasks, are used to evaluate a candidate's submissions. These test cases contain the actual conditions that a candidate's code must meet to get successfully submitted. An input file must have a corresponding output file. You can assign a score to each input and output file.
Prerequisites
- Format: .txt files
- Bulk upload format: .txt files zipped into individual .zip/.tar files
- Naming convention for input files: in00.txt|bin, in01.txt|bin, etc.
- Naming convention for output files: out00.txt|bin, out01.txt|bin, etc.
Uploading manual test cases
To upload manual test cases, follow these steps:
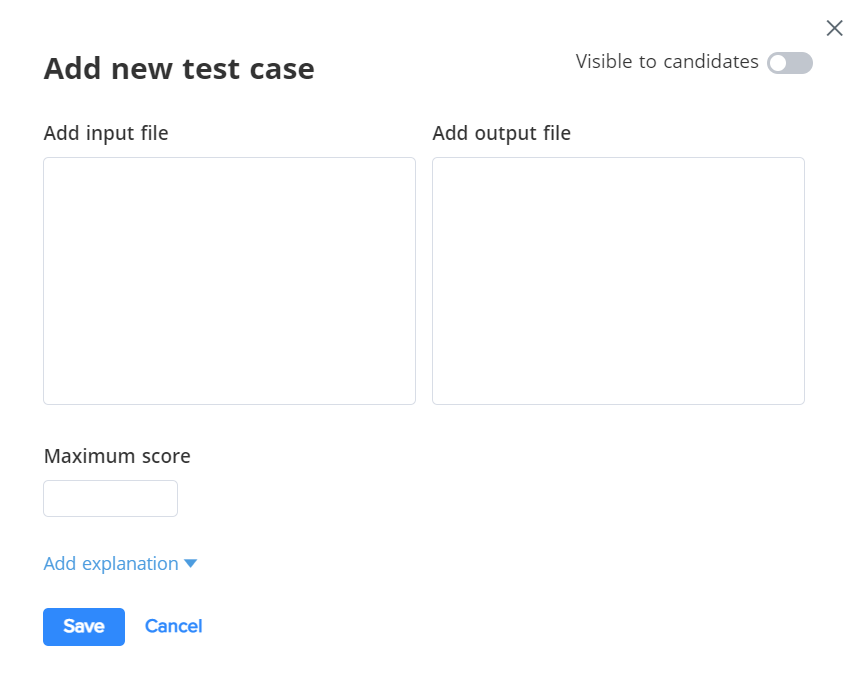
- Click Add test cases.
- A new modal of adding test case appears on the system.
- Click the checkbox beside Visible to candidates to make this test case visible to candidates.
- Hover over Add input file text box and add the input in the field.
- Navigate to the location where the input file is stored in your system.
- Double-click the file.
- Hover over Add output file and add the output in the field.
- Navigate to the location where the output file is stored in your system.
- Double-click the file.
- Enter the maximum score for this particular test case. For example, 20.
- You can also add an explanation to this test case.
- Click Save.
- Repeat these steps for all the input and corresponding output files.
Uploading test cases in bulk
To upload test cases in bulk, follow these steps:
Important: The files should not be put in a folder and zipped. Zip individual .txt files.
- Zip each set of input and output files by following these steps:
- Navigate to the location where the input and output files are saved.
Note: These must follow the naming convention. - Click an input file to select it and press Ctrl and click the corresponding output file to select it.
- Right-click on any of the selected files->Send to->Compressed (zipped folder).
- Navigate to the location where the input and output files are saved.
- Click Upload zip/tar.
- Navigate to the location where the zipped files are stored.
- Double-click the required file. The file is uploaded successfully if you have followed the right naming convention and formats.
- Assign the required score.
Note: You can also edit the test cases after adding or uploading the file. They will open in the same format they were uploaded in. For example, if a test case was a manual test case, then the modal will be a manual test case modal. If the test case was a file upload, the modal will have a file upload option.
Code checker settings
This setting defines the following:
- Maximum time duration (in sec) in which a candidate's code must be executed for individual test cases
- Maximum memory (in MB) that a candidate's code can utilize while being executed
- Maximum size (in KB) of code that can be submitted by a candidate
To set these settings, follow these steps:
- Set the Time limit (sec). For example, 5.
- Set the Memory limit (MB). For example, 256.
- Set the Maximum size of code. For example, 1024.

Allowed languages
Select the programming languages in which candidates can write their code for a programming question.
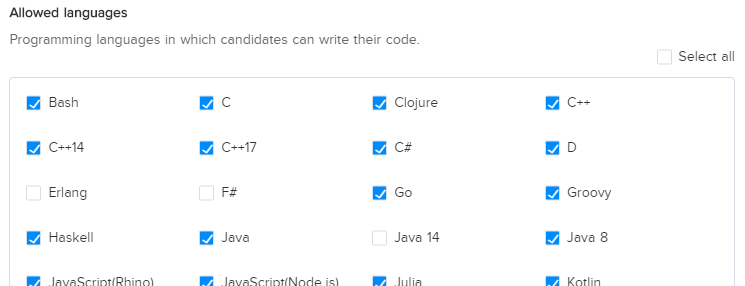
Check the checkbox beside Select all to select all the 41 programming languages in which candidates can write their code.
Code snippets
A code snippet is a boilerplate code that can be used without changing it. This code helps such candidates who are not familiar with the online coding environment to focus more on the algorithm that is required to solve the question rather than understanding the STD INPUT and OUTPUT syntaxes.
To know more about how to generate code snippets in a question, click here.
EditorialThis section contains a detailed approach to solve the question. It is mainly used for internal purposes such as testing the question, formatting the question, and so on.
Steps
To add a sample explanation, follow these steps:
- In the Editorial field, enter the logical explanation of how to solve the question.
- Format as required
Now, click Publish to add the question in the test. If you want to save the question as a draft for any future tasks, then click Save as draft.
Important: You can save your question as a draft at any time to save all the tasks that you have completed at that span of time. For example, if you have added the solution and test cases to the question but you want to select the allowed languages after some time, then click Save as draft. Your tasks or changes will not be lost and you can resume from where you left.
Here is a walkthrough video that demonstrates how to create programming questions step by step: