To create a new project question, follow these steps:
- Log in to HackerEarth Assessment using your admin credentials.
- Click Assessments
- Navigate to the test in which you want to add questions.
- In the Test details section, click Questions.
- Click Create a new question.
- In the Select question type section, select Project under the Real-world subsection.
Entering the question details
- In the Problem name, enter the name of the problem.
- In the Problem statement, write your problem statement.
- Select the difficulty level of your question from the list, Easy, Medium, or Hard.
- In the Maximum score field, enter the maximum marks that you want to assign to candidates if they answer the question correctly. For example, 20 for Easy, 30 for Medium, and 50 for Hard questions.
- In the Tags section, add the tags that are relevant to the question.
For example, if your problem is assessing the knowledge of front-end servers, development technologies, and so on, then you can add multiple tags such as Full stack, front-end technology, servers, development technologies, and so on. - Click Save as draft to save this question.
.png?width=582&height=397&name=Screenshot%20(24).png)
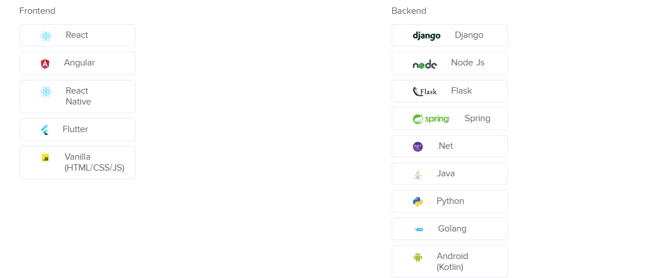
Frameworks
These frameworks are already available on the product that you can use to assess candidates. You can select any one of the front end and backend frameworks by following these steps:
- Select the required front end and backend frameworks. For example, you can select Angular as the front end framework and Spring as the backend framework.
- Click Save as draft.
You cannot change the frameworks once you have selected them. If you want to create a backend-only question, select only the backend framework. Similarly, if you want to create a front end only question, select only the front end framework.
You can also watch this video to learn how to create an Angular and Spring Boot question.
Notes:
1. Make sure that the project folder is less than 5 MB in size.
2. If you are using macOS to create the ZIP file for your project setup, ensure that the MACOSX folder is removed.